MyMeest is an interactive web based interface that will allow you to complete parcel, money and ecommerce orders online. This is a tutorial for Parcel Shipment Service:
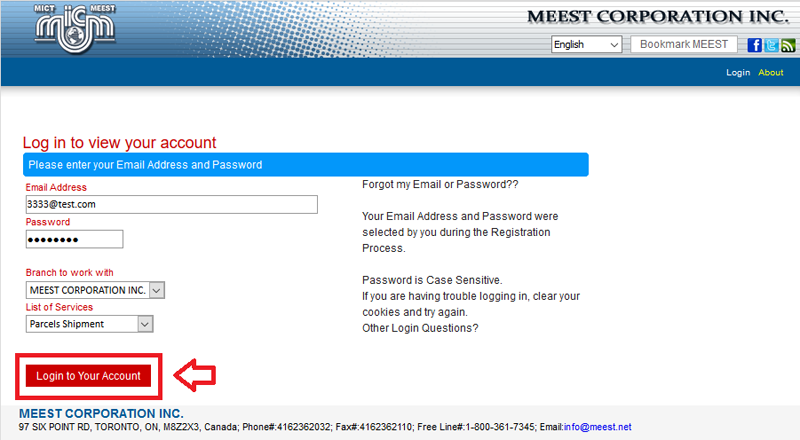
1. To access myMeest follow this link: http://www.mymeest.ca .

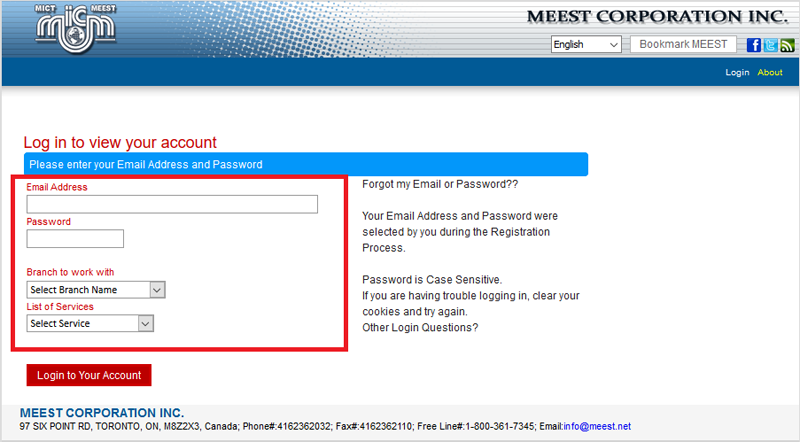
2. Agents – LOGIN with your existing web account to access your online services (please, request your logins at Meest Head Office in Toronto).

3. This section MUST be filled out correctly. Incorrect login information may result in extended delivery times and/or issues with our accounting department.
4. Attention Agents: bottom part of login page must be filled out according to your location (Wholesaler’s location)
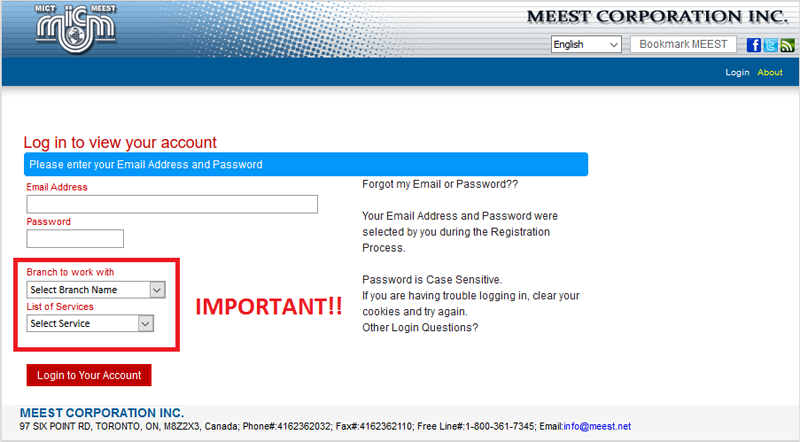
5. Attention, Canada-based Agents: your BRANCH is MEEST CORPORATION. Also, Service Type has to be selected accordingly (This tutorial is for Parcel Shipments Only).
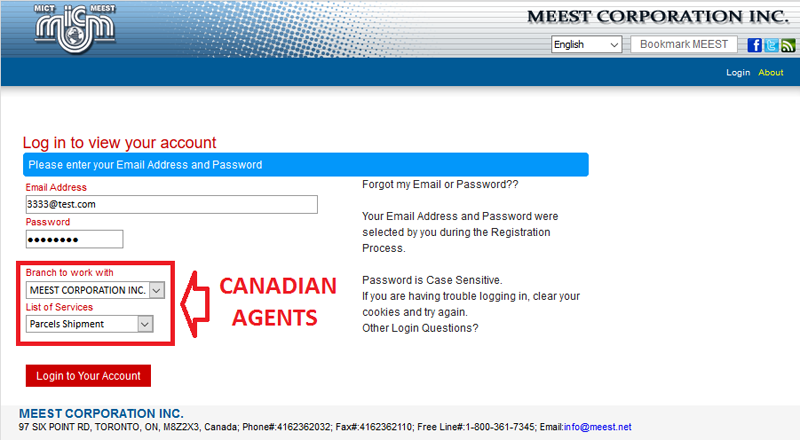
6. Press LOGIN TO YOUR ACCOUNT to login.
7. To make sure your login was successful, check your credentials at the top right corner of your screen. If for any reason credentials are not correct, log out and try again (or contact MEEST for further assistance).
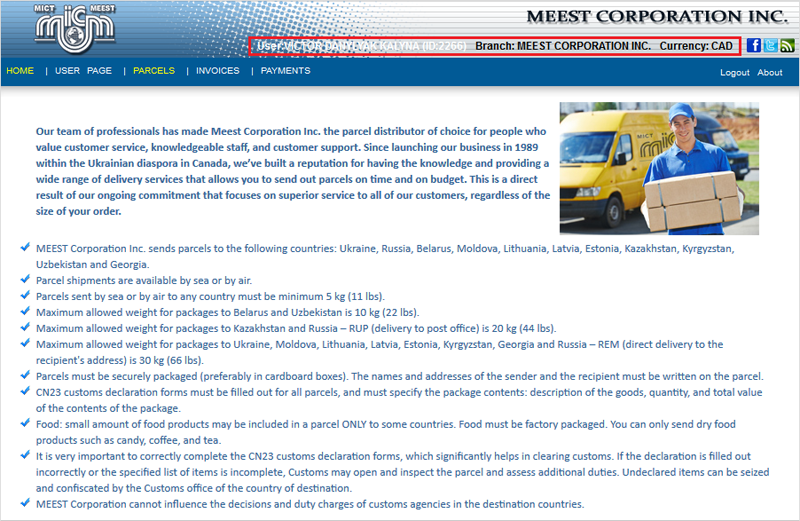
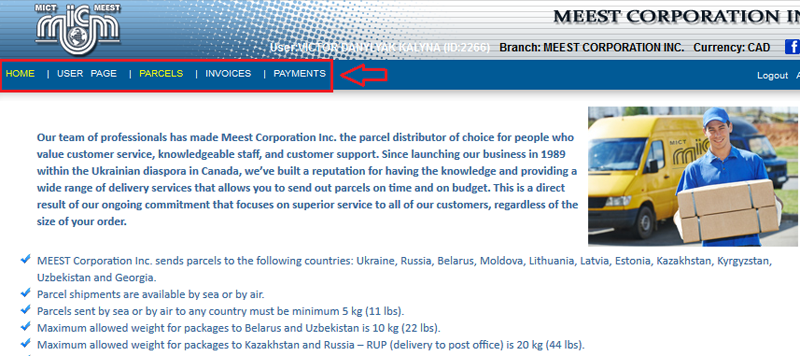
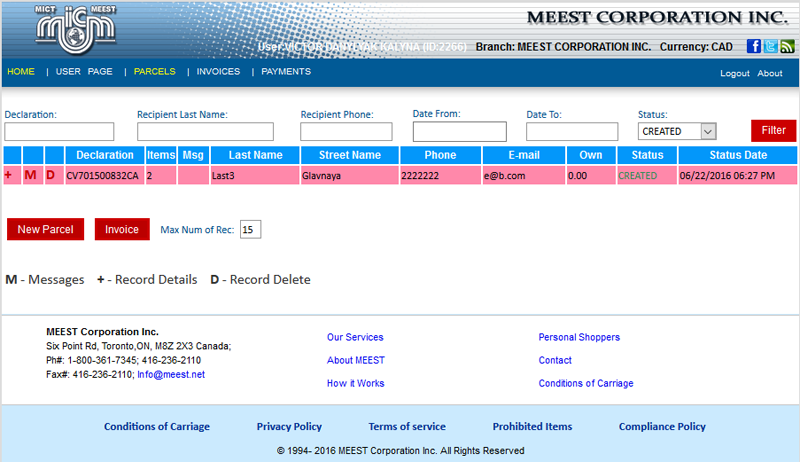
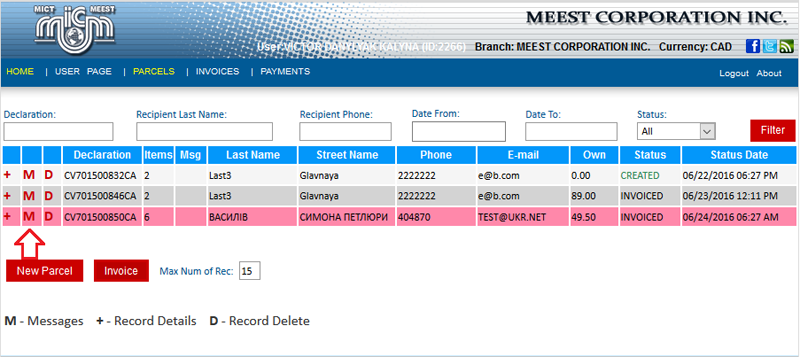
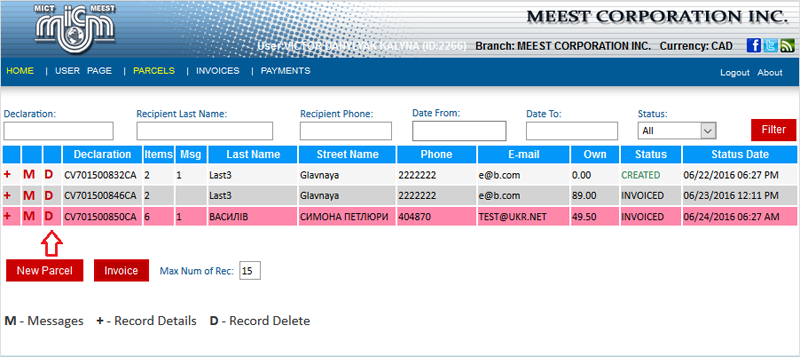
8. On the top left corner you will find your TOOL BAR (image below is a screen shot of PARCEL SHIPMENT services).
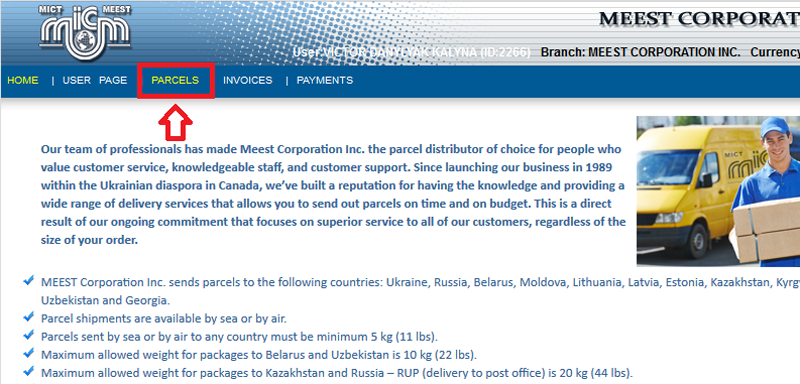
9. Click PARCELS tab to access this service.
10. In this tab you will see a list of your entries.
11. To create a new entry, press NEW PARCEL.
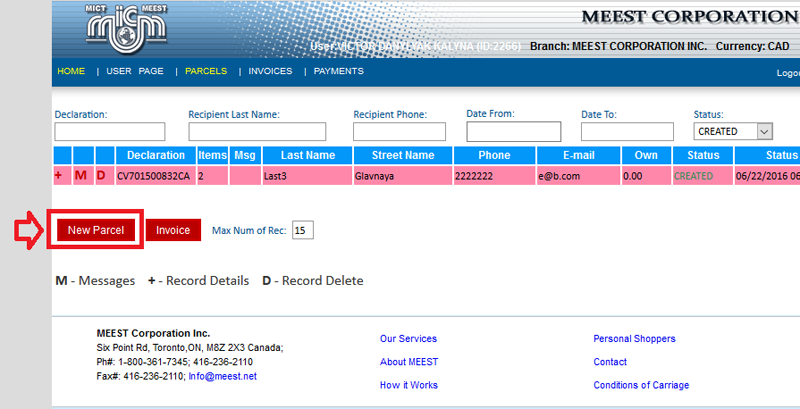
12. ADD RECORD pop-up window will appear allowing you start the process.
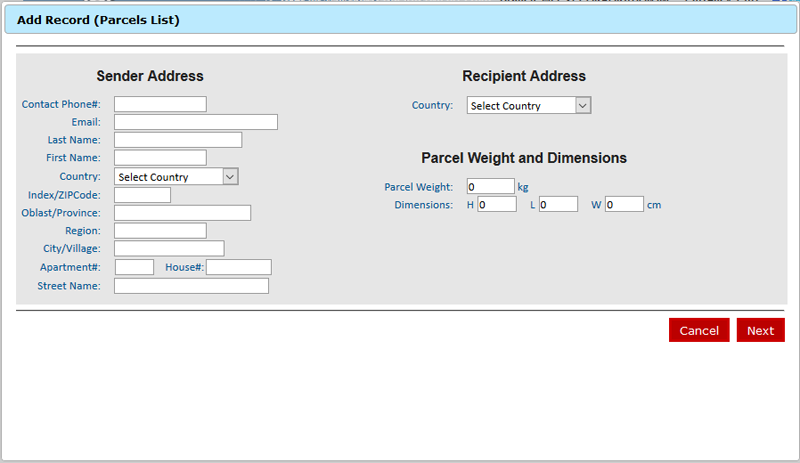
13. It is IMPORTANT to fill out this section completely without missing any fields. Please, note that DIMENSSIONS filed is only optional for SEA shipments. AIR shipments must contain measurements for proper order processing.
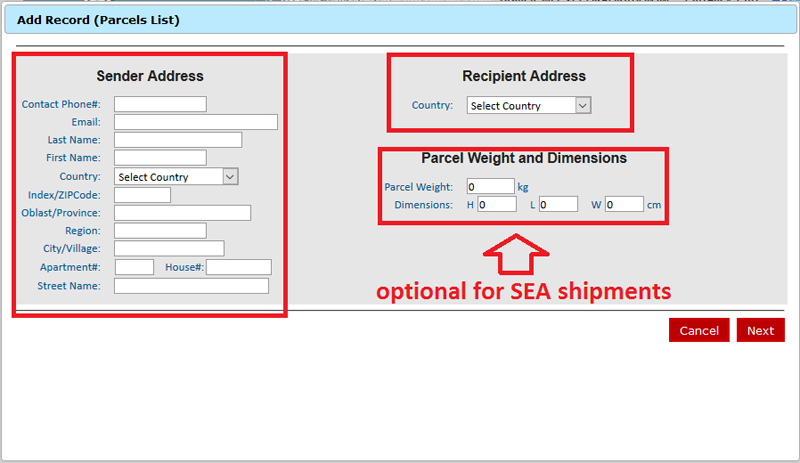
14. After completing this section you may press NEXT to continue with your entry.
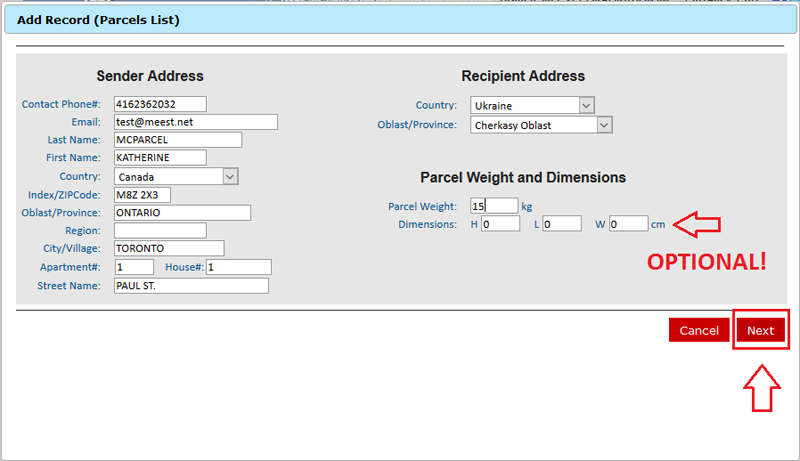
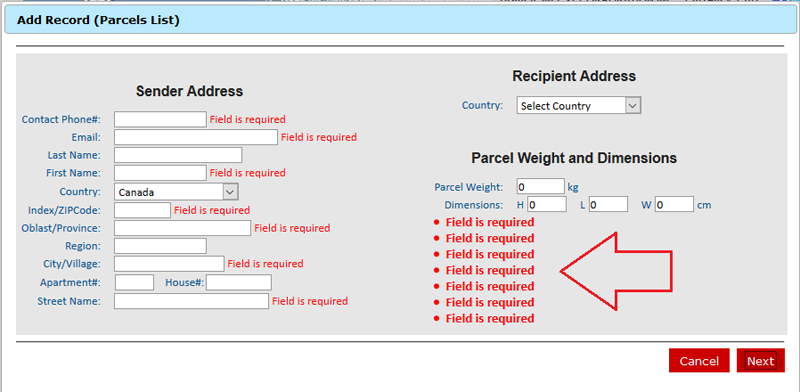
15. Note that if you are missing any or all FIELDS, you will NOT be able to continue with your entry.
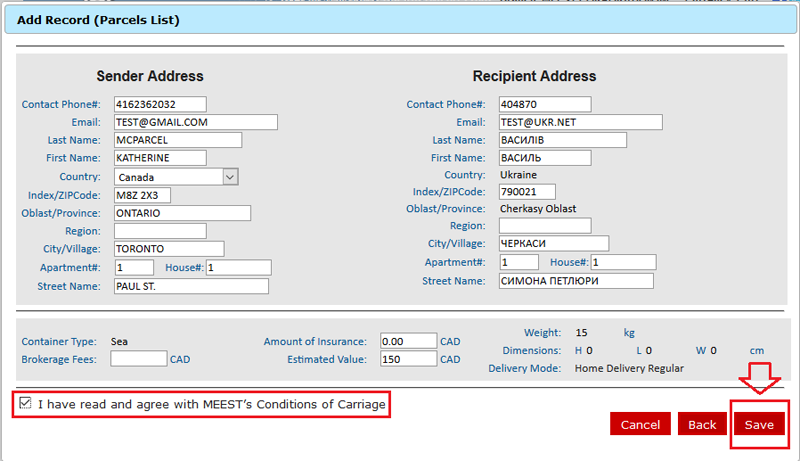
SENDER ADDRESS is an important part of CN23 customs declaration. Failure to provide proper information will result in processing delays.
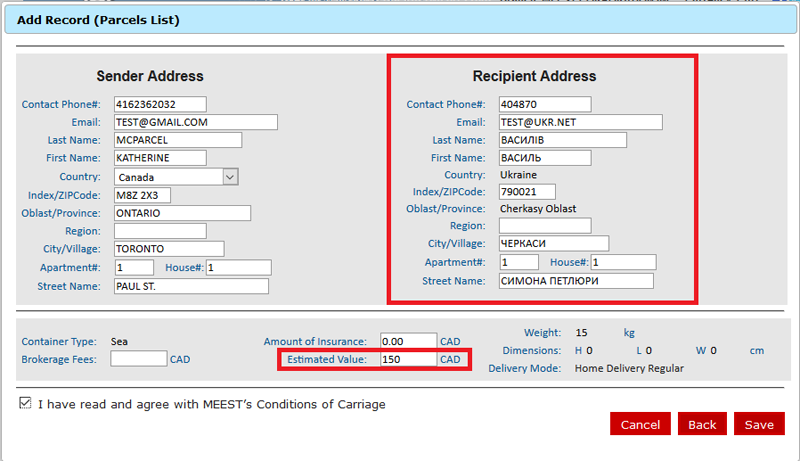
16. After inputting required information you will be able to choose your DELIVERY OPTIONS. Choose your option and click NEXT to continue.

17. RECIPIENT ADDRESS and ESTIMATED VALUE must be filled out before proceeding. These fields are also required for proper order processing and delivery.
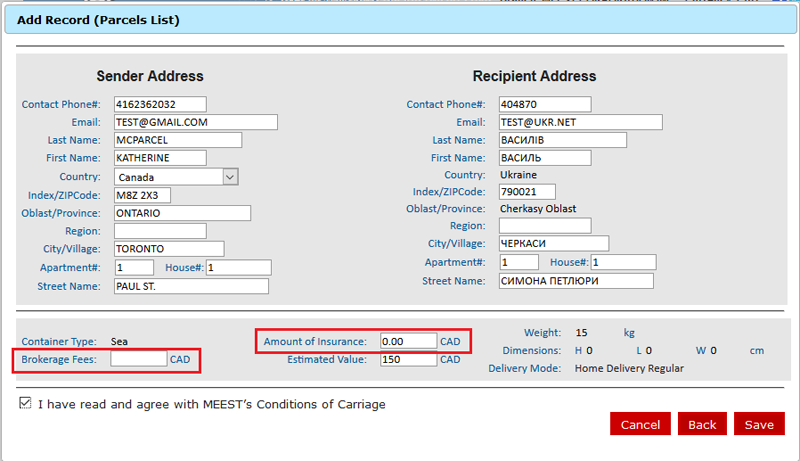
18. BROKERAGE FEES are entered only if Package Value is greater than 200.00 CAD (CONTACT HEAD OFFICE FOR AN ESTIMATE); AMOUNT OF INSURANCE is entirely up to the customer. Both fields are not mandatory.
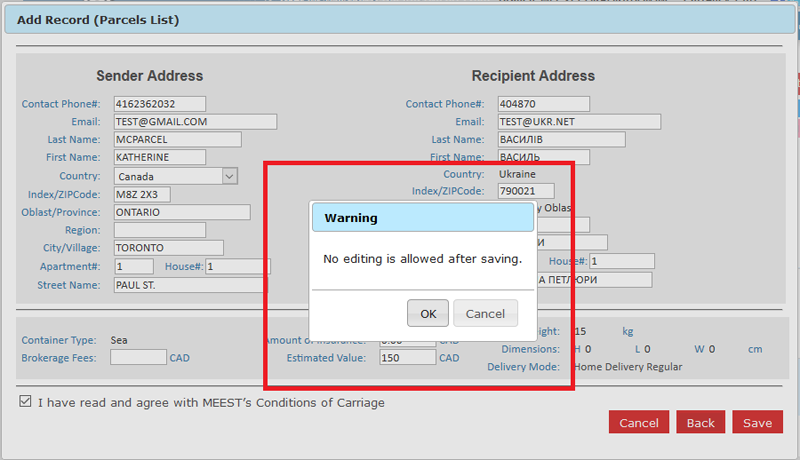
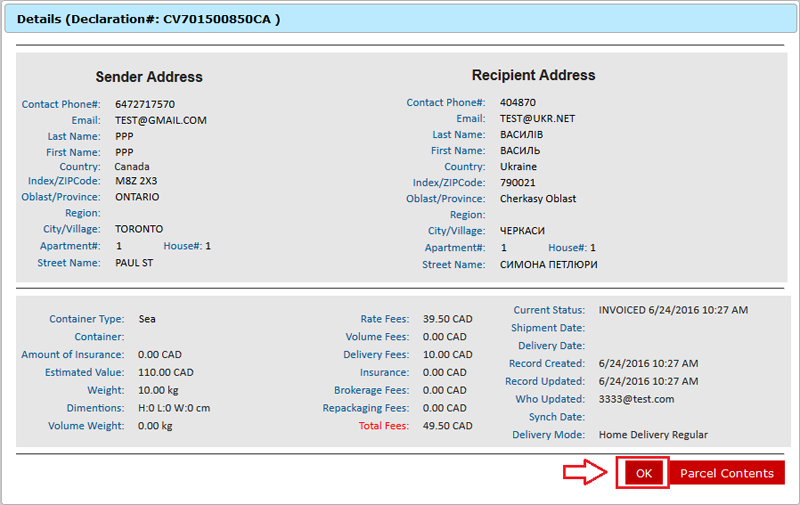
19. To continue with your order, read MEEST’s Conditions of Carriage, tick off the CHECKMARK and press SAVE .
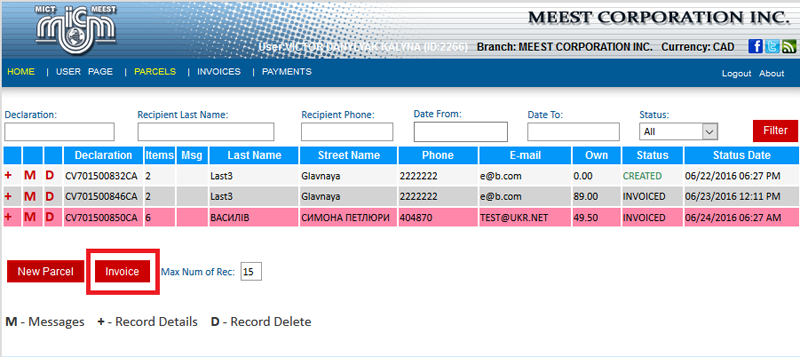
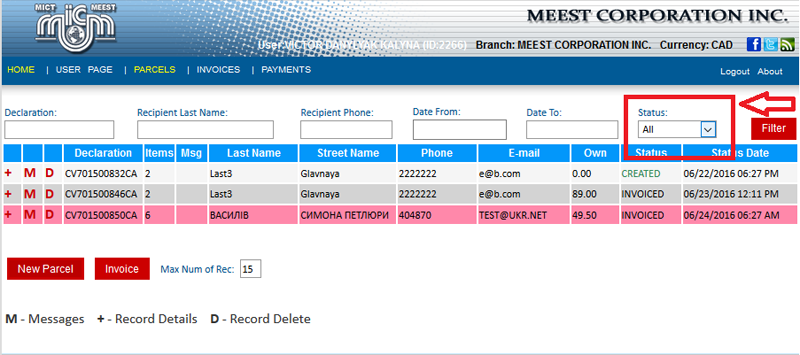
20. After clicking the SAVE button, warning message will appear, notifying you to review your order before saving. Attention: after confirming by clicking OK button you will not be able to edit your order (for more information, please contact our Head Office in Toronto).
21. After saving your order you’ll see the list of your previous and newly created orders.
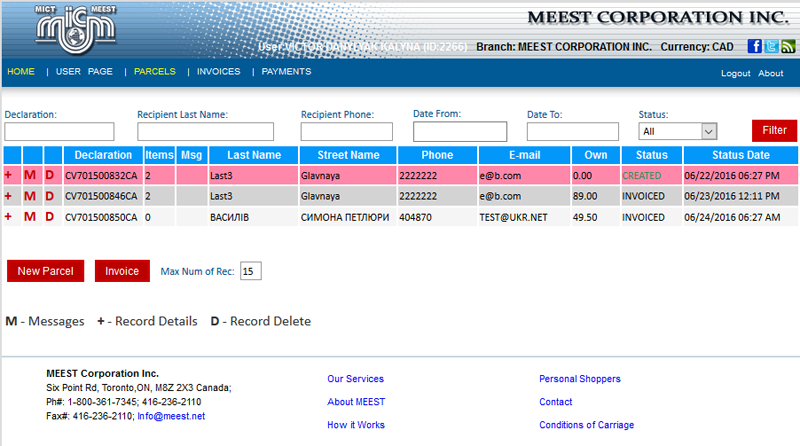
22. You will need to select your newly created order to proceed.
Click on the Package Number to select it.
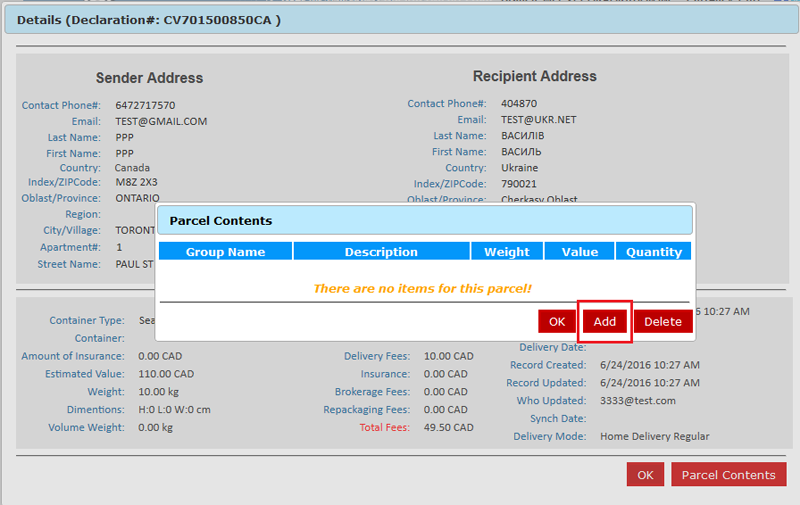
23. Press “+” to add parcel contents to your order.

24. PARCEL CONTENTS button will take you to the next window where you can start adding items.

25. Press ADD to start adding items.
26. GROUP NAME, DESCRIPTION AND QUANTITY are mandatory fields. Choose your items carefully according to the list.
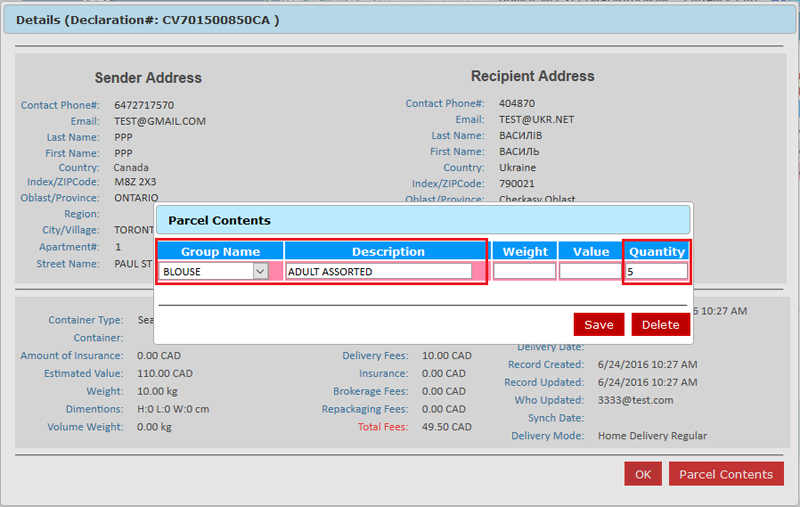
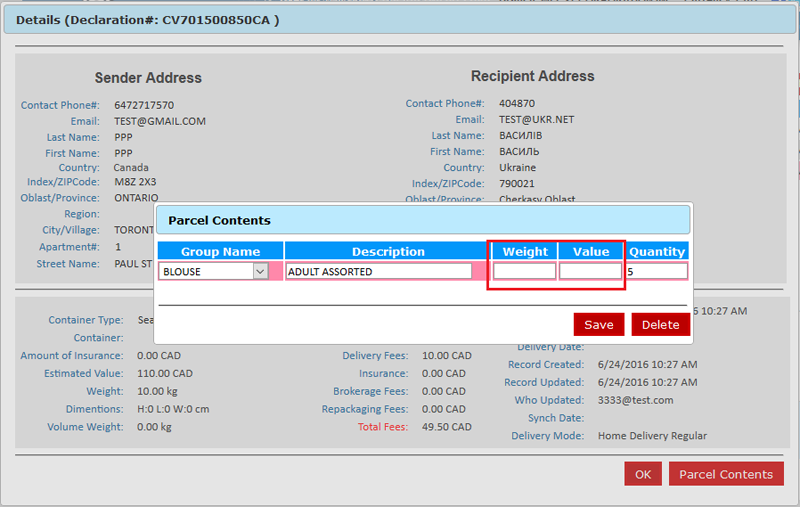
27. WEIGHT and VALUE fields are optional.
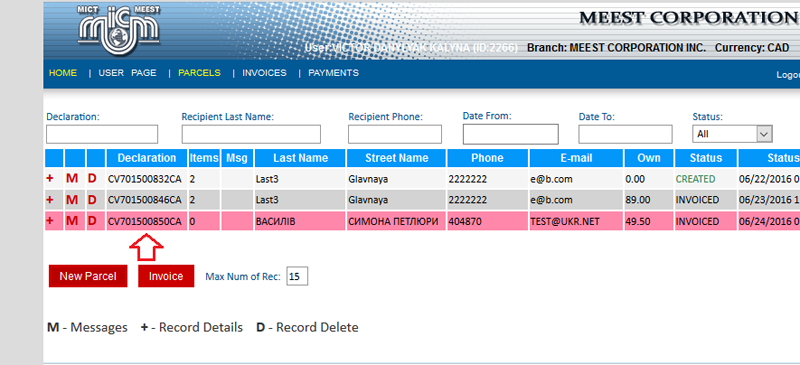
28. After listing all items, press OK button.
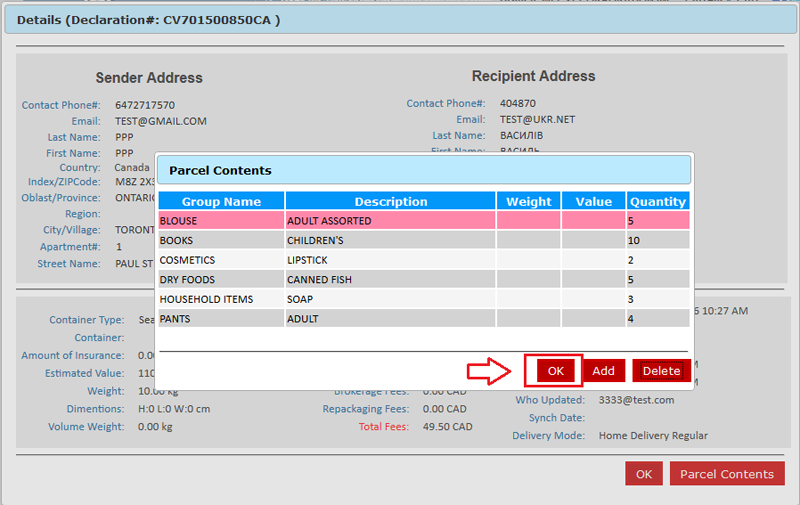
29. Press OK again to get to your main screen.
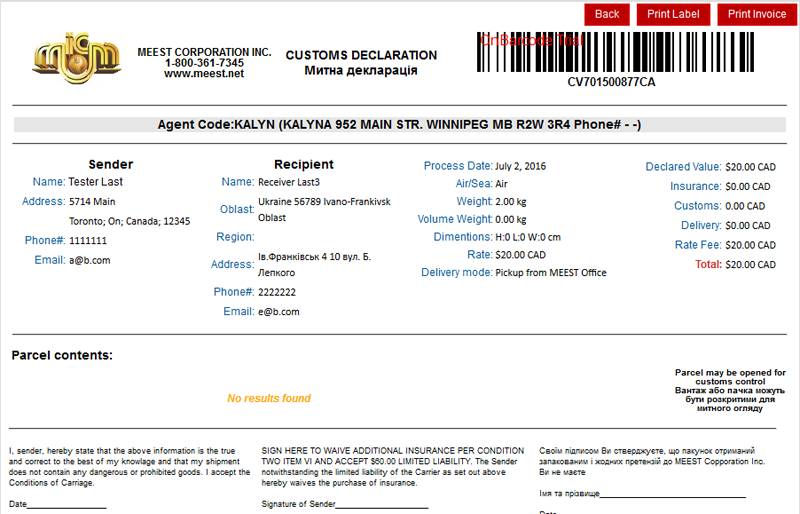
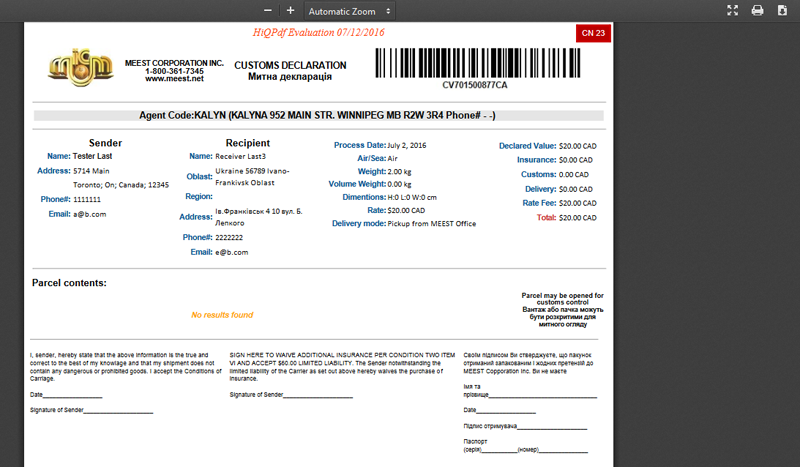
30. To print your INVOICE (CN23 form) select your package by clicking on the Package Number. Note that the number has to be highlighted in order to continue.

31. Next, click the INVOICE button to proceed.
32. CN23 FORM will appear on your screen.
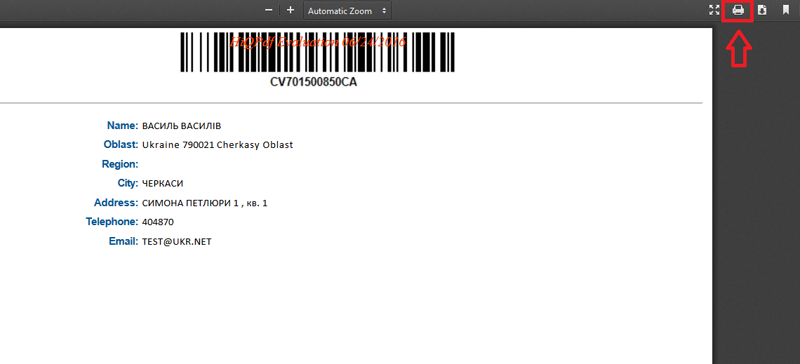
33. Press PRINT INVOICE to continue.
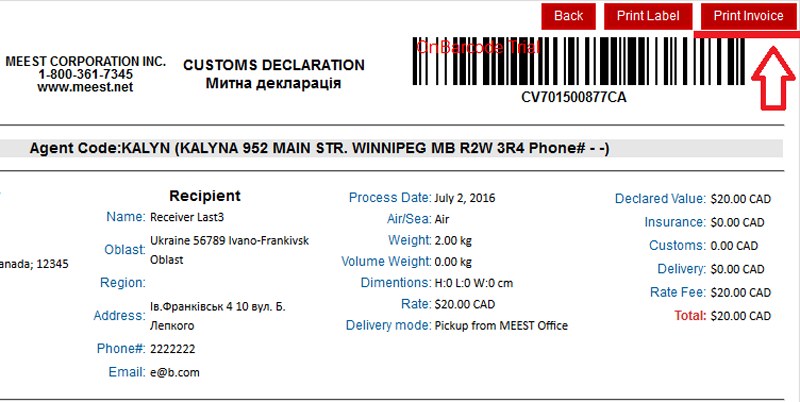
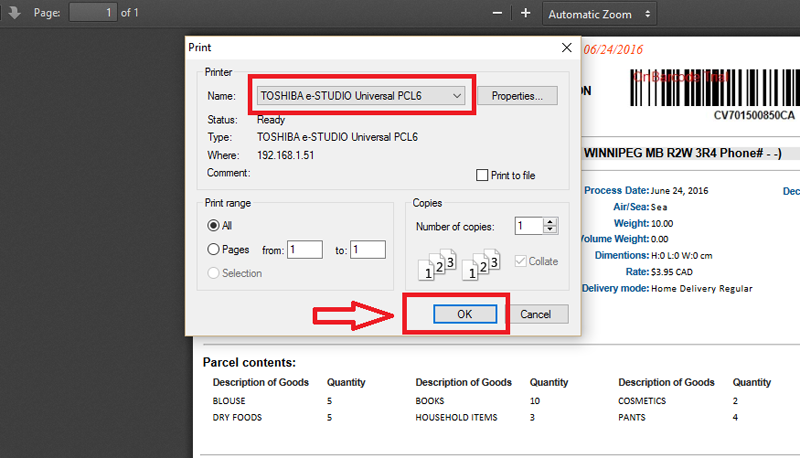
34. You will be redirected to PDF format INVOICE. (Please, make sure that your PDF viewer or Acrobat Reader is up-to-date! If you encounter any problems at this point, refer to adobe.com or call our Head Office for assistance).
35. Press PRINTER icon on you PDF viewer to proceed with your invoice. Also, you may save it to your computer by pressing DOWNLOAD Icon which is next to the PRINTER ICON.

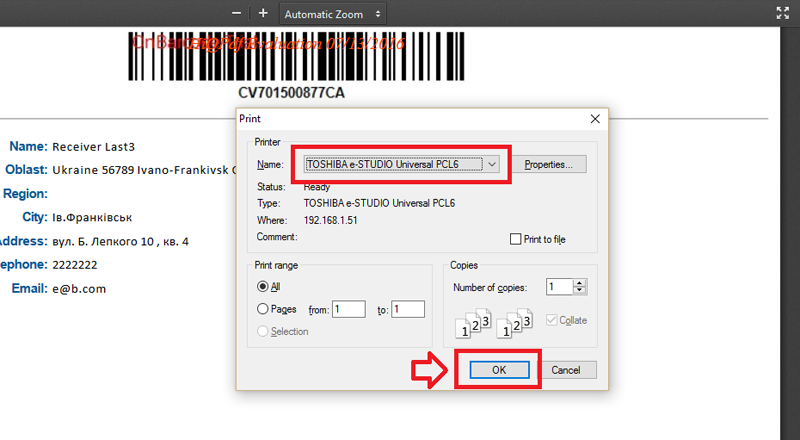
36. Choose your printer and press OK to print your INVOICE.
37. Next step is to print your LABEL. Locate your PRINT LABEL button on the screen from step 33 and click on it.
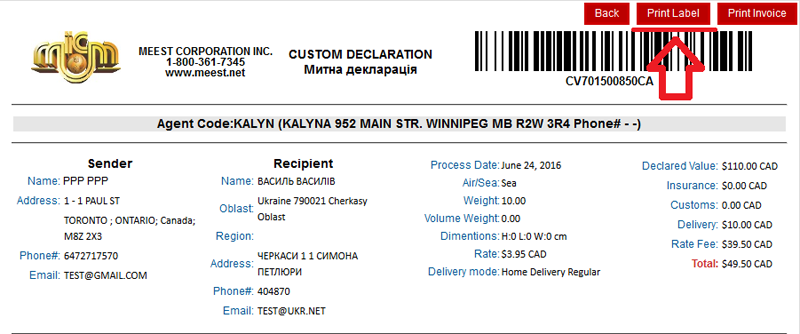
38. You will be redirected to PDF format LABEL (Please, make sure that your PDF viewer or Acrobat Reader is up-to-date! If you encounter any problems at this point, refer to adobe.com or call our Head Office for assistance).
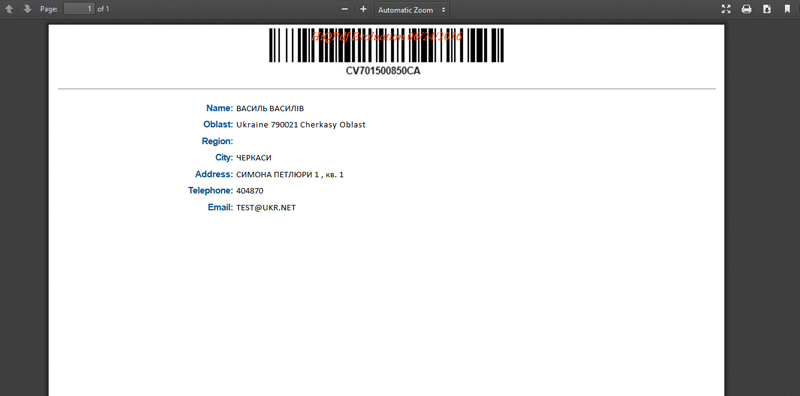
39. Press PRINTER icon on you PDF viewer to proceed with your LABEL. Also, you may save it to your computer by pressing DOWNLOAD Icon which is next to the PRINTER ICON.
40. Choose your printer and press OK to print your LABEL.
At this point your order is complete. ONE INVOICE goes to the customer, ONE signed INVOICE (by customer) stays with you and TWO LABELS have to be attached to the package.
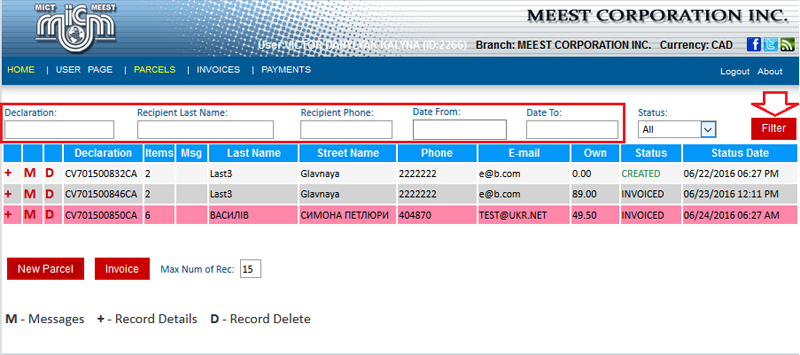
FILTER OPTION:
FILTER is a powerful tool that will help you sort through your records with ease.
1. Select STATUS as ALL.
2. After you can filter your orders by PACKAGE NUMBER, LAST NAME, PHONE NUMBER and DATE.
MESSAGE BOARD AND DELETE
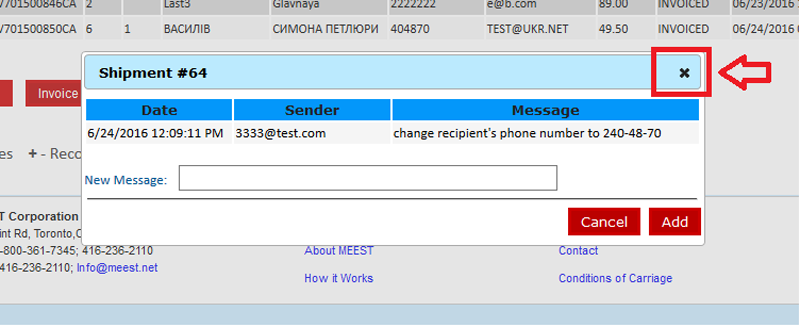
1. Message Board tool will help you to and add information to your order. Please note that this will be the only method of “EDITING” your records. To start choose your record by clicking on the package number and pressing “M”.
2. Input your notes into the highlighted field and press “ADD” button.
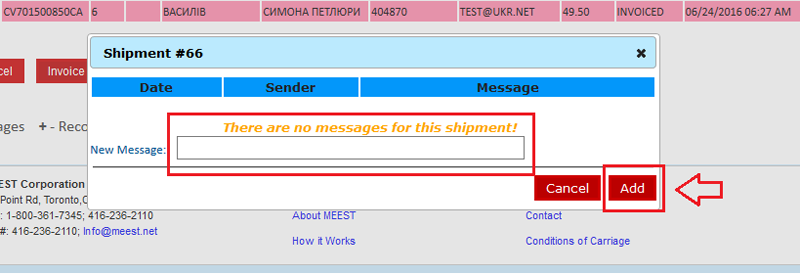
3. Information you’ve added will be sent to our Head Office and processed in timely manner. To CANCEL a message simply click CANCEL button.
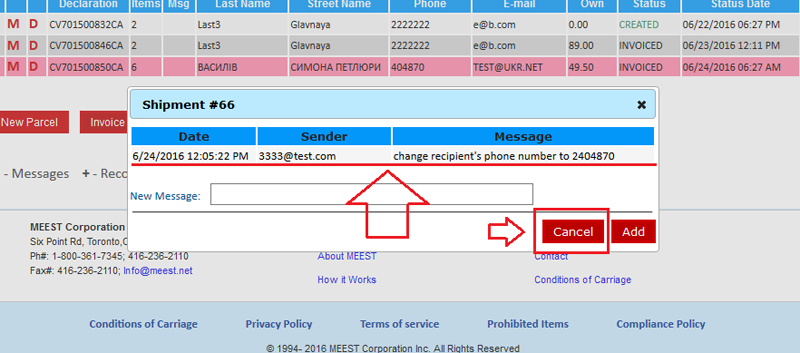
4. To close the Message Board click on the “X”.
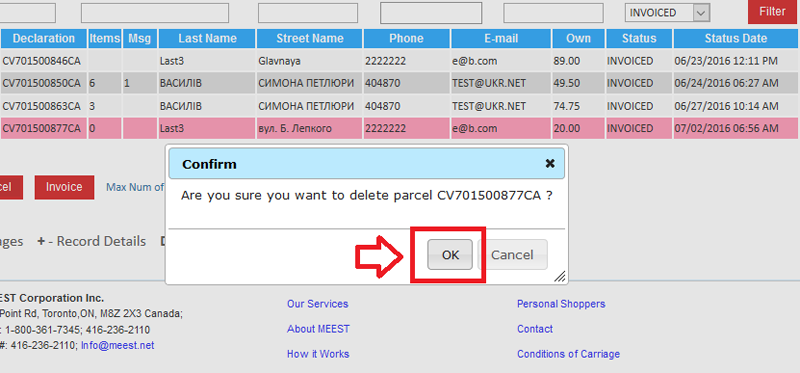
5. To DELETE your record, simply select it by clicking on parcel number and then “D”.
6. Window will appear asking you to confirm your action. Press OK to continue or CANCEL to disregard this action.